Showing posts with label vcb. Show all posts

Tuesday, May 24, 2011

VMware VDR licensing

Here I wrote about availability of VMware VDR in almost all the editions of vSphere - newly in Standard edition as well. VDR provides agent-less backups of  virtual machines and in-line block based destination deduplication.

This license change applies for all installations or upgrades to the latest release 4.1 update 1 of ESXi hypervisor. The  screenshot below shows the licensed features of one of my ESXi servers with  ESXi 4.1 update 1, build 348481, standard edition.

Sunday, May 15, 2011

VMware Data Recovery

How do you backup your virtual infrastructure based on VMware platform? Do you still rely on VCB? Even if the VCB is still supported and it is compatible with the latest ESX/ESXi hypervisor at version 4.1u1 it should be discontinued from the next release. So what backup tool to use in the future? 

VMware vDR is considered to be its successor and in my opinion, the latest release is working pretty stable without any major issue. It's missing some features now like email reporting or GUI FLR restore tool but I think we can expect the future release will include them as the competing backup tools don't miss such basic things.

But what I consider the most important for better adoption of vDR in datacenters is that VMware corrected their licenses recently and vDR is now included in Standard edition as well. This means that vDR is available in all vSphere editions except vSphere Essentials kit.

Friday, January 21, 2011

VCB basic usage - debugging

During the series of articles about VCB usage I supposed that all the presented VCB command examples are running smoothly and without errors. But this is not always true. There can  be a lot of reason why it is not working as expected, e.g. wrong permissions assigned to VCB backup user, misconfigured SAN which doesn't allow to access VMFS volumes or  unspecified problem with creating virtual machine snapshot.

If something goes wrong all VCB commands can be run in more verbose mode with command line switch -L and verbosity level from 0 to 6. The next example illustrates it. We want to perform a full backup of a virtual machine named vcb-backup and it seems the provided user vcbadmin doesn't have required permissions to do it:
vcbmounter -h host -u vcbadmin -p pass -a name:vcb-backup -r c:\mnt\vcb-backup -t fullvm -m nbd -L4
[2010-06-15 13:15:12.843 'vcbMounter' 360 info] Connected using API Namespace vim25.
[2010-06-15 13:15:12.843 'vcbMounter' 360 info] Authenticating user vcbadmin
[2010-06-15 13:15:12.859 'vcbMounter' 360 info] Logged in!
[2010-06-15 13:15:12.890 'vcbMounter' 360 info] Got VM MoRef
[2010-06-15 13:15:12.890 'vcbMounter' 360 info] Got access method
[2010-06-15 13:15:12.890 'vcbMounter' 360 info] Got coordinator object
[2010-06-15 13:15:12.890 'vcbMounter' 360 info] Attempting data access.
[2010-06-15 13:15:12.890 'vcbMounter' 360 info] Creating mount directory
[2010-06-15 13:15:12.890 'vcbMounter' 360 info] No snapshot info for this VM, nothing to do.
[2010-06-15 13:15:12.890 'vcbMounter' 360 info] Creating snapshot
[2010-06-15 13:15:19.296 'vcbMounter' 360 info] Snapshot created, ID: snapshot-579
[2010-06-15 13:15:19.296 'vcbMounter' 360 info] Mount operation created snapshot.
[2010-06-15 13:15:19.312 'vcbMounter' 360 info] Mount operation obtained backupinfo.
[2010-06-15 13:15:19.312 'vcbMounter' 360 info] Performing SearchIndex find.
[2010-06-15 13:15:19.328 'vcbMounter' 360 info] Successfully obtained instance lock.
[2010-06-15 13:15:24.359 'vcbMounter' 360 error] Error: No permission to perform this action.
[2010-06-15 13:15:24.359 'vcbMounter' 360 error] An error occurred, cleaning up...
[2010-06-15 13:15:24.359 'vcbMounter' 360 info] Performing SearchIndex find.
[2010-06-15 13:15:24.359 'vcbMounter' 360 info] Successfully obtained instance lock.
[2010-06-15 13:15:29.437 'vcbMounter' 360 info] Remove clone disks successful.
Deleted directory c:\vcb\vcb-backup
The bold line helps us to identify the cause of the problem.

Wednesday, March 4, 2009

VCB, vcbMounter, vcbRestore ... updated

I have added another article dedicated to VMware VCB and backups over Samba or Windows shares. Here is updated list of them:
  1. VM identification - how to identify a virtual machine you intend to backup? The command vcbvmname is the answer.
  2. VM full backup - how to perform a full backup of the chosen virtual machine? The vcbmounter command can do it.
  3. VM full backup data access - how to retrieve data from the virtual machine's full backup? It is possible to mount the backup image with the mountvm command.
  4. VM file level backup - the vcbmounter command is able to perform file-level backup as well.
  5. VM backup over NFS - this article describes a simple scenario of virtual machine backup over NFS protocol.
  6. VM backup restore - it is important to know the process of restoring a virtual machine from the backup. You can use vcbrestore.
  7. VM backup with Samba or Windows share - the other approach how to perform backups of virtual machines is to use Samba or Windows shares instead of NFS server.

Friday, February 27, 2009

VCB basic usage - VM full backup with Samba

In the previous article about VMware VCB, I wrote about full backups to NFS shares. For completeness, I decided to write another one dedicated to backups to Samba or Windows shares.

The idea of backup is the same. Let's have a Samba server available at IP address 192.168.1.1. The exported directory for backups is backup-smb and the user which has write access to this share is backup.

Before we will be able to continue we need to allow smbclient to access Samba server. You can perform it from VI client or directly from ESX service console via esxcfg-firewall command. First, let's check if smbclient is allowed:
esxcfg-firewall -q smbClient
The output of command should be by default:
Service smbClient is blocked.
To reconfigure ESX firewall to allow smbclient access use the next command:
esxcfg-firewall -e smbClient
Now, you should be able to browse the server (the command asks for user's password first):
 smbclient  -L 192.168.1.1 -U backup
The example command output follows (Samba server on SLES10):
Domain=[NAS] OS=[Unix] Server=[Samba 3.0.28-0.2-1625-SUSE-CODE10]
Sharename       Type      Comment
--------- ---- -------
profiles Disk Network Profiles Service
backup-smb Disk
IPC$ IPC IPC Service (Samba 3.0.28-0.2-1625-SUSE-CODE10)
Domain=[NAS] OS=[Unix] Server=[Samba 3.0.28-0.2-1625-SUSE-CODE10]
Now, we are ready to create a simple backup script:
#!/bin/sh

BACKUP_SERVER="192.168.1.1"
BACKUP_USER="backup"
BACKUP_PASS="backup"
SMB_SHARE="backup-smb"
MOUNT_DIR="/backup"

[ -d $MOUNT_DIR ] || mkdir -p "$MOUNT_DIR" || exit 1

VM_BACKUP="`vcbVmName -s any: | grep name: | cut -d':' -f2`"

if [ ! -z "$VM_BACKUP" ]; then
smbmount //${BACKUP_SERVER}/$SMB_SHARE $MOUNT_DIR \
-o username=${BACKUP_USER},password=$BACKUP_PASS || exit 1

for VM in $VM_BACKUP; do
vcbMounter -a name:$VM -r $MOUNT_DIR/$VM
done

umount $MOUNT_DIR
fi

exit 0
It is simple, isn't it? The code is almost the same as for backups over NFS. We added variables defining our Samba user and his password. The mount command was exchanged with smbmount which is CLI Samba client. If you insist on using the mount command replace the line mounting the backup-smb share with line:
mount -t smbfs //${BACKUP_SERVER}/$SMB_SHARE $MOUNT_DIR \
-o username=${BACKUP_USER},password=$BACKUP_PASS || exit 1
That's all. In such simple backup scenarios I prefer NFS usage because it is simple to set and provides higher throughput than SMB protocol. On the other hand, SMB protocol provides basic authentication mechanism (if you don't disable it).

Thursday, November 6, 2008

VCB, vcbMounter, vcbRestore ...

I have written a series of articles about VMware VCB usage. They are concerned about main VCB principles. The backup procedures are performed via VCB command line utilities. It's not bad idea to make a quick list of articles for better orientation among them:
  1. VM identification - how to identify a virtual machine you intend to backup? The command vcbvmname is the answer.
  2. VM full backup - how to perform a full backup of the chosen virtual machine? The vcbmounter command can do it.
  3. VM full backup data access - how to retrieve data from the virtual machine's full backup? It is possible to mount the backup image with the mountvm command.
  4. VM file level backup - the vcbmounter command is able to perform file-level backup as well.
  5. VM backup over NFS - this article describes a simple scenario of virtual machine backup over NFS protocol.
  6. VM backup restore - finally, it is important to know the process of restoring a virtual machine from the backup. You can use vcbrestore.
I hope this quick list of articles will help you to find what you are looking for. Your prompts are welcome.

Thursday, October 30, 2008

VCB basic usage - VM restore with vcbRestore

The last question remains - how to restore the fully backuped virtual machine as we made it in the previous article? The virtual machine is stored at the NFS server and we need to get it back to the ESX host. There are many possible scenarios to do it - e.g., the original machine is corrupted and you have to restore it from backup. Or you don't have VirtualCenter Server available and you would like to deploy a virtual machine like from template without template feature.

Virtual machine full backup performed with vcbMouter command is defined with a specific catalog file which contains summary of backup. The catalog file contains definitions of virtual machine's:
  • display name
  • name of datastore
  • folder path
  • resource pool
Let's inspect one of such catalog files:
version= esx-3.0
state= poweredOn
display_name= "nas-openfiler"
uuid= "564da78f-f2fc-484f-4d92-24238e486380"
disk.scsi0:0.filename= "scsi0-0-0-nas-openfiler.vmdk"
disk.scsi0:0.diskname= "[storage1] nas-openfiler/nas-openfiler.vmdk"
config.vmx= "[storage1] nas-openfiler/nas-openfiler.vmx"
host= vmware.dom.tld
timestamp= "Sun Oct 12 01:37:12 2008"
config.suspenddir= "[storage1] nas-openfiler"
config.snapshotdir= "[storage1] nas-openfiler"
config.file0= "nas-openfiler.vmsd"
config.file1= "nas-openfiler-cf281ca9.vmss"
config.file2= "nas-openfiler.vmxf"
config.file3= "nas-openfiler.nvram"
config.logdir= "[storage1] nas-openfiler"
config.log0= "vmware-1.log"
config.log1= "vmware.log"
folderpath= "/ha-folder-root/ha-datacenter/vm"
resourcepool= "/ha-folder-root/ha-datacenter/host/vmware.dom.tld/Resources"
Now, what can we say about the backuped virtual machine?
  • it is visible as nas-openfiler in VI client (the display name is nas-openfiler)
  • it is stored at the [storage1] datastore in the nas-openfiler directory
  • it belongs to the vm folder in the VirtualCenter folder hierarchy
  • it is running at vmware.dom.tld ESX host
As you can see, everything around the virtual machine is stored inside the ""[storage1] nas-openfiler" directory. The datastore name is a symbolic name of datastore. You can check it via VI client in storage configuration tab. Or you list the contents of the /vmfs/volumes directory.

Let's suppose, we want to create identical machine like "nas-openfiler" but we want to restore it to a different datastore and directory, e.g. "[storage2] nas-openfiler2", and we want to call it "nas-openfiler2". To do it, we need to change selected parameters in the catalog file:
version= esx-3.0
state= poweredOn
display_name= "nas-openfiler2"
uuid= "564da78f-f2fc-484f-4d92-24238e486380"
disk.scsi0:0.filename= "scsi0-0-0-nas-openfiler.vmdk"
disk.scsi0:0.diskname= "[storage2] nas-openfiler2/nas-openfiler.vmdk"
config.vmx= "[storage2] nas-openfiler2/nas-openfiler.vmx"
host= vmware.dom.tld
timestamp= "Sun Oct 12 01:37:12 2008"
config.suspenddir= "[storage2] nas-openfiler2"
config.snapshotdir= "[storage2] nas-openfiler2"
config.file0= "nas-openfiler.vmsd"
config.file1= "nas-openfiler-cf281ca9.vmss"
config.file2= "nas-openfiler.vmxf"
config.file3= "nas-openfiler.nvram"
config.logdir= "[storage2] nas-openfiler2"
config.log0= "vmware-1.log"
config.log1= "vmware.log"
folderpath= "/ha-folder-root/ha-datacenter/vm"
resourcepool= "/ha-folder-root/ha-datacenter/host/vmware.dom.tld/Resources"
It is recommended to backup the original catalog file somewhere. Try to compare them and to notice the changes.
The last step is we need to perform restore operation with the vcbRestore command. Let's our full backup of virtual machine is in the directory /backup/nas-openfiler. The directory can be local directory or mounted from the NFS server. The original catalog file is catalog and modified one catalog.new. Let's go to restore the machine according to new catalog:
vcbRestore -s /backup/nas-openfiler -a /backup/nas-openfiler/catalog.new
The -s parameter specifies the source directory where the backup is stored and -a parameter specifies use this particular catalog file. If everything is working the command should produce next output:
[2008-10-17 11:00:21.644 'App' 3076444992 info]
Current working directory: /backup/nas-openfiler2
Converting "/vmfs/volumes/storage2/nas-openfiler2/nas-openfiler.vmdk" (VMFS (flat)):
0%=====================50%=====================100%
**************************************************
The machine was restored and you can see it in VI client interface. Or you can check it from the service console of ESX host:
vmware-cmd -l | grep nas-openfiler2
It should print something like this:
/vmfs/volumes/483c.../nas-openfiler2/nas-openfiler.vmx
The new virtual machine nas-openfiler2 can be powered on now. It is identical with the original one by the contents - both machines are the same, but they have different datastore. Final customization is for another article.

Monday, October 27, 2008

VCB basic usage - VM full backup over NFS

Let's go to practice a bit. Let's have a NFS server in the network available. And we would like to backup virtual machines (VMs) from one of our ESX hosts directly to it, without usage of any specialized backup software.

I don't have to forget to say that VCB is available in your ESX host. There is installed VMware-esx-backuptools package which contains almost all the mentioned commands before - vcbVmName, vcbMounter and vcbRestore. The vcbRestore utility is available only with ESX and it is used to restore a virtual machine from full backup. Additionally, the missing mountVm command is available with VCB for Windows only. Don't forget to keep in mind that VCB commands for ESX are case-sensitive beause of service console based on Linux.

Firstly, we need a running NFS server. The configuration is straightforward with any Linux distro. Install required packages, edit /etc/exports configuration file and paste here a directory which will be used for backup of VMs. Start NFS server and reconfigure firewall to allow access to it (or simply stop it). For details, check the related documentation. If you would like I can write some more notes about it.

So, let's have a NFS server with IP address 192.168.1.1 (from C class). The exported directory is the /backup/vm directory. Secondly, we need to permit NFS client at the ESX host. By default, outgoing connections from any ESX host are blocked. You can do it via VI client or from the service console like this:
esxcfg-firewall -e nfsClient
You can check all the available services with:
esxcfg-firewall -s
To check if the nfsClient service was enabled, run this:
esxcfg-firewall -q nfsClient
If so, you will receive:
Service nfsClient is enabled.
Finally, we need a backup script whose only task is to backup available VMs. The script can be scheduled at ESX host via cron service or from the NFS backup server. It's your choice. The script follows:
#!/bin/sh

BACKUP_SERVER="192.168.1.1"
BACKUP_DIR="/backup/vm"
MOUNT_DIR="/backup/snap"

[ -d $MOUNT_DIR ] || mkdir -p "$MOUNT_DIR" || exit 1

VM_BACKUP="`vcbVmName -s any: | grep name: | cut -d':' -f2`"

if [ ! -z "$VM_BACKUP" ]; then
mount $BACKUP_SERVER:$BACKUP_DIR $MOUNT_DIR || exit 1

for VM in $VM_BACKUP; do
vcbMounter -a name:$VM -r $MOUNT_DIR/$VM
done

umount $MOUNT_DIR
fi

exit 0
Now, simple description of the script. At the beginning, there are defined some variables - the NFS server IP address, the exported directory and the local mount point. Then, the available VMs are listed and saved in a variable. The exported directory from the NFS server is mounted and with the vcbMounter command the VMs are backuped. Finally, the directory is unmounted. If you want to use the commands without authentication credentials, you need to define them in the file /etc/vmware/backuptools.conf. Exactly, these parameters are required:
VCHOST=127.0.0.1
USERNAME=admin_user
PASSWORD=admin_user_password
So, the task to backup virtual machines isn't so sophisticated. In the next article, I'm going to restore them with vcbRestore command.

Wednesday, October 1, 2008

VCB basic usage - VM file-level backup with vcbMounter

The performance of full backup running over LAN network is not optimal because it requires to copy virtual machine disks locally. That may take some time. The usage of SAN or Hot-Add mode is far better in such situations.

The file-level backup is more suitable for LAN networks because it doesn't export any disks. It is able to mount the disk directly and you can access its filesystem without mountvm command like I described here. By the way, this holds for Windows OSes because VCB supports NTFS or FAT filesystems only.

Let's take our previous virtual machine vcb-backup and try to do file-level backup. We will use the same command but with different value of -t parameter:
vcbmounter -h VC_IP -u VC_USER -p VC_PASS -a name:vcb-backup
-r c:\mnt\vcb-backup -t file -m nbd
The virtual disk will be mounted under the C:\mnt\vcb-backup directory in LAN mode. The successful mounting will print the following messages (some lines may be split due to their length):
Opened disk: vpxa-nfc://[STORAGE] vcb-backup/vcb-backup.vmdk@\
VC_IP!52 79 b4 1a d5 0a 84 31-fd 1c e3 fe f8 31 db ed
Proceeding to analyze volumes
Done mounting
Volume 1 mounted at c:\mnt\vcb-backup\digits\1 (mbSize=12291 \
fsType=NTFS )
Volume 1 also mounted on c:\mnt\vcb-backup\letters\C
Again, the NTFS filesystem is accessible via its letter. Now, you can copy the files inside, you can backup the directory structure but you can't delete anything. The reason is you are not working with the virtual disk directly but with its snapshot called _VCB_SNAPSHOT_ (full backup with vcbMounter). Here is a screenshot from Virtual Infrastructure Client proving it:

When we are finished with backup we need to unmount it. It differs from unmounting exported virtual disk because we need to delete the snapshot as well. This is reachable with the vcbmounter command and -U parameter:
vcbmounter -h VC_IP -u VC_USER -p VC_PASS -U c:\mnt\vcb-backup
The output is similar to the one we have seen already:
Unmounted c:\mnt\vcb-backup\digits\1\ (formatted)
Deleted directory c:\mnt\vcb-backup\digits\1\
Deleted directory c:\mnt\vcb-backup\digits
Deleted directory c:\mnt\vcb-backup\letters\C\
Deleted directory c:\mnt\vcb-backup\letters
Deleted directory c:\mnt\vcb-backup

And that's all the magic. Do you remember as we need to export the virtual disk at first and then to mount it? The file-level backup is straightforward. You can bypass copying the virtual disks over LAN and you can do the backup directly.

The conclusion is:
  1. Use the file-level backup where it is possible (Windows machines)
  2. Otherwise use the full backup (UNIX machines)

Wednesday, September 24, 2008

VCB basic usage - VM mount with mountVm

The full backup of virtual machine vcb-backup was finished and we have its virtual disk available locally now. We can backup it directly or we can access its filesystem and backup selected filesystem structure only (e.g. we want to backup some application data only).

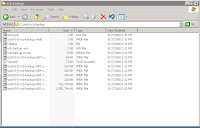
The virtual disk and the whole virtual machine is available in the c:\mnt\vcb-backup\ directory. It contains everything what we might require for its restoration (VMX and VMDK configuration files, NVRAM states and so on). This screenshot figures its content:

The virtual disk path is available from the output of vcbmounter command:
c:\mnt\vcb-backup\scsi0-0-0-vcb-backup.vmdk
To browse the filesystem, we will mount it with the mountvm command:
mountvm -cycleId -d c:\mnt\vcb-backup\scsi0-0-0-vcb-backup.vmdk \
c:\vcb-backup
The successful execution of it will produce messages like these:
Opened disk: c:\mnt\vcb-backup\scsi0-0-0-vcb-backup.vmdk
Proceeding to analyze volumes
Done mounting
Volume 1 mounted at c:\vcb-backup\digits\1 (mbSize=12291 fsType=NTFS )
Volume 1 also mounted on c:\vcb-backup\letters\C
A virtual machine disk represents an image of x86 harddisk with own MBR and partition table. Our disk contains only one partition with NTFS filesystem linked with drive letter C. Each such a letter is mounted under the directory which we specified with -d option (again, the directory is created on demand and it can't exist before). In our scenario, we have c:\vcb-backup\letters.

We are able to traverse the filesystem now and backup its particular files or directories. When we are finished, we will have to unmount it:
mountvm -u c:\vcb-backup
If the mounted filesystem isn't busy, the command will print these messages (otherwise it will end with an error):
Unmounted c:\vcb-backup\digits\1\ (formatted)
Deleted directory c:\vcb-backup\digits\1\
Deleted directory c:\vcb-backup\digits
Deleted directory c:\vcb-backup\letters\C\
Deleted directory c:\vcb-backup\letters
Deleted directory c:\vcb-backup
Finally, let's make a summary of virtual machine full backup steps:
  1. we need to identify the machine (vcbvmname)
  2. we need to export its virtual disk (vcbmounter -t fullvm)
  3. optionally, we might need to mount its filesystem (mountvm)
  4. backup the exported disk
  5. backup the mounted filesystem if mounted
  6. unmount the filesystem if mounted (mountvm -u)
That's all for now. Any question or suggestions are welcome.

Friday, September 19, 2008

VCB basic usage - VM full backup with vcbMounter

Let's choose the virtual machine called vcb-backup and perform its backup. Before we proceed, we should stop to explain that VCB is capable of doing two types of backup:
  1. full backup
  2. file-level backup
The file-level backup is available for Windows operating systems only. The full backup means to backup virtual machine images. You can use it with every type of virtual machine.

Next thing, we need to remember to choose the right transport mode:
  1. SAN mode - bypassing VCB proxy via FC or iSCSI SAN (LAN-free backup)
  2. Hot-Add mode - VCB proxy in a virtual machine
  3. LAN mode - backup over LAN network
In SAN mode, both ESX host and VCB proxy has to have access to the shared storage. The backup is completely offloaded from the ESX host which provides virtual machine disks and their snapshots only. The whole process is moved to the VCB proxy which reads disks directly from the SAN. The Hot-Add mode is interesting in that way, it is able to access virtual machine disks directly but without the SAN. If the VCB proxy is virtualized, it is hot added virtual machine disks. Nothing suprising, VMware ESX is capable of hot-adding disks to a virtual machine. The drawback is that you need to have one virtualized VCB proxy on each ESX host so that it can backup all virtual machines hosted on them. The LAN mode uses network protocols to access the virtual machine disks. By the way, the SAN mode is supported by VCB and VMware ESX natively. The remaining two modes requires VMware ESX(i) 3.5 or later.

The vcbmounter command is used for virtual machine backup. The following command will initiate a full backup of vcb-backup virtual machine in LAN mode:
vcbmounter -h VC_IP -u VC_USER -p VC_PASS -a name:vcb-backup \
-r c:\mnt\vcb-backup -t fullvm -m nbd
The -r parameter defines a directory of backup location. The -m parameter specifies transport mode (available values are san, hotadd, nbd/nbdssl). The directory can't exist. It is created on demand. The command should produce the following output when it finishes:
Copying "[system-raid1] vcb-backup/vcb-backup.vmx":
0%=====================50%=====================100%
**************************************************
Copying "[system-raid1] vcb-backup/vcb-backup.nvram":
0%=====================50%=====================100%
**************************************************
Copying "[system-raid1] vcb-backup//vmware.log":
0%=====================50%=====================100%
**************************************************
Converting "c:\mnt\vcb-backup\scsi0-0-0-vcb-backup.vmdk" (compact file):
0%=====================50%=====================100%
**************************************************

As you can see, the VCB proxy is copying virtual machine disks to the defined local storage. More precisely, the ESX host provides virtual machine snapshots to the VCB proxy which copies them to the local storage (you can check it with snapshot manager - there will be a snapshot called _VCB-BACKUP_). After that, you can backup them with your favorite backup software. Or you can access them with mountvm command.

Wednesday, September 17, 2008

VCB basic usage - VM idetification with vcbVmName

Before we begin the backup process of selected virtual machine, we need to identify it so that VCB can contact VirtualCenter server and start the backup session. This step is simple and requires to run the vcbvmname command. The VirtualCenter server contacts particular ESX hosts and send a list of hosted virtual machines back. Follows the example of command usage:
vcbVmName.exe -h VC_IP -u VC_USER -p VC_PASS -s any:
The most of used command line options are almost common for all VCB commands:
  • -h - hostname or IP address of VirtualCenter server
  • -u - VirtualCenter user who is allowed to do virtual machine backup (at least user with VMware Consolidated Backup User role)
  • -p - VirtualCenter user password
The -s option is more specific and defines virtual machine identifier prefixed with a search pattern. The any: pattern means search for any available virtual machine. This identifier is used by other commands for virtual machine identification as well. It is possible to identify it by IP address, name and so on. What does the above command produce?
Found VM:
moref:vm-99
name:vcb-backup
uuid:5022bd2a-0de0-9c82-e30e-063c976a8a29
ipaddr:132.100.0.29
Found VM:
moref:vm-97
name:vcb-test
uuid:5022ab4a-f7f4-03a2-1434-f2af63938718
ipaddr:132.100.0.28
Here, you can see all virtual machine identifiers - name (name:), IP address (ipaddr:), virtual machine unique identifier (uuid:) and managed object reference (moref:). You can use them as search pattern instead of any: universal pattern. For example, the next command will find the virtual machine with name vcb-test only:
vcbVmName.exe -h VC_IP -u VC_USER -p VC_PASS -s name:vcb-test
Now, we know how to identify the particular machine and next time, we are going to backup it.

Thursday, September 11, 2008

VCB basic usage - introduction

Do you know about some useful guide which introduces VCB commands? In my case, I haven't find any yet. I found some articles about the topic which helped me a bit but no one was usable as a reference guide. So, I am still missing such a guide. Unfortunately, the basic usage of VCB commands is comprehensible.

I don't want to write anything advanced for now. Just basics, no SAN, no backup agents. Just to explain what VCB contains. Let's suppose we wanted to export virtual machine disk files or mount them to a Windows station and then to backup it. The backup will run over the network. We need to mount the images, backup them and unmount them after that.

So, which command do we have? Which can help us with the tasks described above? Let's explore them:
  • vcbvmname - connects to the VirtualCenter server and lists the available virtual machines
  • vcbmounter - allows to export/mount the virtual machine disk files to the backup station
  • mountvm - allows to mount the exported virtual machines disk files locally
  • vcbrestore - allows to completely restore the virtual machine disk files to the ESX host
The usage of the commands will be explained in the following article. Now, if you know about any guide focused on VCB usage, please, share it with us.